用 NotePad++ 開啟 <專案名稱>.csproj.user
修改下列設定:
<ActiveDebugProfile>Docker</ActiveDebugProfile>
改成
<ActiveDebugProfile>Debug</ActiveDebugProfile>
就能不跑 docker 偵錯
2019年6月27日 星期四

2019年5月28日 星期二
ASP.NET Core WebAPI 中的分析工具 MiniProfiler
NuGet 安裝 MiniProfiler.AspNetCore.Mvc
在 Startup.cs 上新增程式碼
在 xxxxController 新增測試碼
在瀏覽器上輸入 http://localhost:port/api/xxxx 可呼叫此程式

執行完畢
在 http://localhost:port/profiler/results 可以看到 MiniProfiler

在 Startup.cs 上新增程式碼
public void ConfigureServices(IServiceCollection services)
{
 services.AddMvc();


 #region Register the MiniProfiler services

 services.AddMiniProfiler(options => options.RouteBasePath = "/profiler");

 #endregion Register the MiniProfiler services

 ....
}

public void Configure(IApplicationBuilder app, IHostingEnvironment env)
{
 app.UseResponseCompression();

 if (env.IsDevelopment())
 {
  app.UseDeveloperExceptionPage();
 }


 #region Register the MiniProfiler

 app.UseMiniProfiler();

 #endregion Register the MiniProfiler

}
在 xxxxController 新增測試碼
[HttpGet]
public IEnumerable Get()
{
 string url1 = string.Empty;
 string url2 = string.Empty;
 using (MiniProfiler.Current.Step("Get方法"))
 {
  using (MiniProfiler.Current.Step("準備數據"))
  {
   using (MiniProfiler.Current.CustomTiming("SQL", "SELECT * FROM Config"))
   {
    // 模擬一個SQL查詢
    Thread.Sleep(500);

    url1 = "https://www.baidu.com";
    url2 = "https://www.sina.com.cn/";
   }
  }


  using (MiniProfiler.Current.Step("使用從數據庫中查詢的數據,進行Http請求"))
  {
   using (MiniProfiler.Current.CustomTiming("HTTP", "GET " + url1))
   {
    var client = new WebClient();
    var reply = client.DownloadString(url1);
   }

   using (MiniProfiler.Current.CustomTiming("HTTP", "GET " + url2))
   {
    var client = new WebClient();
    var reply = client.DownloadString(url2);
   }
  }
 }
 return new string[] { "value1", "value2" };
}
在瀏覽器上輸入 http://localhost:port/api/xxxx 可呼叫此程式

執行完畢
在 http://localhost:port/profiler/results 可以看到 MiniProfiler

2019年5月25日 星期六
ASP.NET Core 安裝 NSwag 自動產生 API 說明文件檔案
目的:自動抓取註解產生下面的 API 說明文件網頁
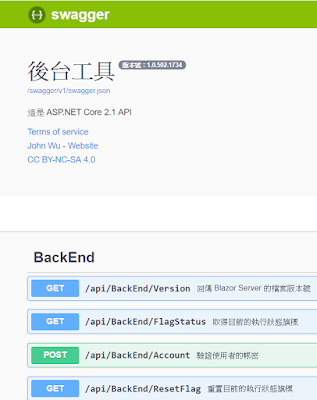
上次講到 Swashbuckle 在 Ubuntu 環境,
專案執行發生異常,
於是就換了 NSwag,
目前執行下來沒什麼問題,
這邊記錄一下安裝的過程與要注意的事項。
安裝 NuGet 套件:
NSwag.AspNetCore NSwag 主要套件
NSwag.SwaggerGeneration.AspNetCore 自動從 cs 抓註解到我們指定的 xml 檔案

新增「隱藏警告:1591」
PS.特別要注意 xml 檔案名稱要跟專案一樣,才能自動抓取到註解內容
先引用 NSwag.AspNetCore
設定一下 Startup.cs 的 ConfigureServices
與設定一下 Startup.cs 的 Configure
記得註解 <summary> 要寫,每次編譯後 XML 的內容都會更新唷!
程式開啟後,輸入網址 http://localhost:port/swagger
就能開啟 Swagger UI 網頁
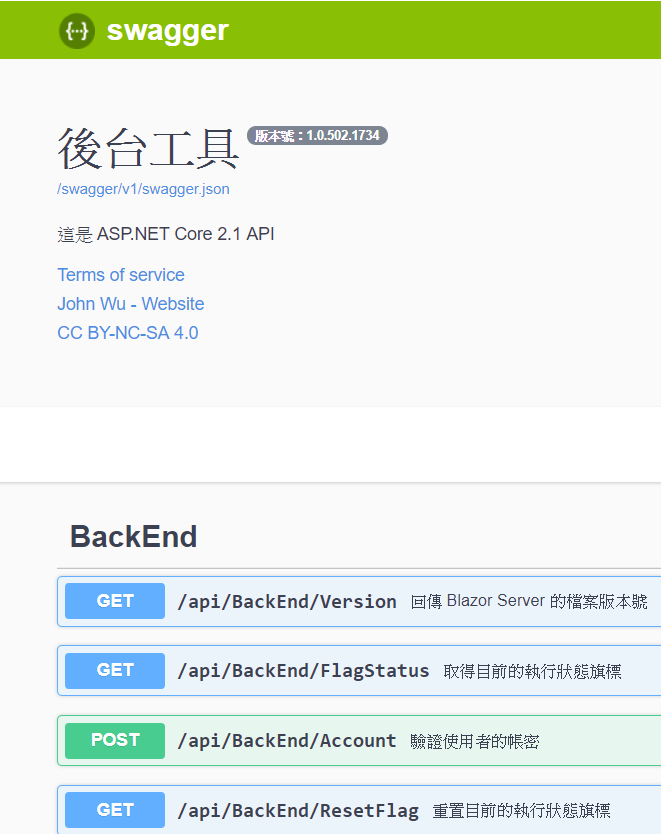
上次講到 Swashbuckle 在 Ubuntu 環境,
專案執行發生異常,
於是就換了 NSwag,
目前執行下來沒什麼問題,
這邊記錄一下安裝的過程與要注意的事項。
安裝 NuGet 套件:
NSwag.AspNetCore NSwag 主要套件
NSwag.SwaggerGeneration.AspNetCore 自動從 cs 抓註解到我們指定的 xml 檔案

新增「隱藏警告:1591」
PS.特別要注意 xml 檔案名稱要跟專案一樣,才能自動抓取到註解內容
先引用 NSwag.AspNetCore
using NSwag.AspNetCore;
設定一下 Startup.cs 的 ConfigureServices
public void ConfigureServices(IServiceCollection services)
{
 services.AddMvc();


 #region Register the Swagger services

 // Register the Swagger services
 services.AddSwaggerDocument();

 #endregion Register the Swagger services
}
與設定一下 Startup.cs 的 Configure
public void Configure(IApplicationBuilder app, IHostingEnvironment env)
{


       #region Register the Swagger generator and the Swagger UI middlewares

       // Register the Swagger generator and the Swagger UI middlewares

        app.UseSwagger();
        app.UseSwaggerUi3();

        #endregion Register the Swagger generator and the Swagger UI middlewares


        app.UseMvc(routes =>
        {
             routes.MapRoute(name: "default", template: "{controller}/{action}/{id?}");
        });
}
記得註解 <summary> 要寫,每次編譯後 XML 的內容都會更新唷!
/// <summary>
/// 簡單的 Controller 範例
/// </summary>
程式開啟後,輸入網址 http://localhost:port/swagger
就能開啟 Swagger UI 網頁
2019年5月18日 星期六
ASP.NET Core 安裝 Swashbuckle 自動產生 API 說明文件檔案
目的:自動抓取註解產生下面的 API 說明文件網頁
NuGet 安裝 Swashbuckle.AspNetCore
引用 Swashbuckle.AspNetCore.Swagger
點選「屬性」「建置」
新增「隱藏警告」1591
新增「XML 文件檔案」程式碼設定 Swagger.xml 這邊也填入 Swagger.xml

設定 Startup.cs 的 Configure
就能開啟 Swagger UI 網頁
PS.在 Blazor 安裝 Swagger 後,
在 Ubuntu 上執行有異常(收不到封包),
最後換了 NSwag 才正常
NuGet 安裝 Swashbuckle.AspNetCore
引用 Swashbuckle.AspNetCore.Swagger
using Swashbuckle.AspNetCore.Swagger;
public void ConfigureServices(IServiceCollection services)
{
 services.AddMvc();

 #region 註冊 Swagger
 // 註冊 Swagger
 services.AddSwaggerGen(c =>
 {
  c.SwaggerDoc(
   // name: 攸關 SwaggerDocument 的 URL 位置。
   name: "v1",
   // info: 是用於 SwaggerDocument 版本資訊的顯示(內容非必填)。
   info: new Info
   {
    Title = "標題",
    Version = "版本號 1.0.0",
    Description = "說明",
    TermsOfService = "無",
    Contact = new Contact
    {
     Name = "強尼 John Wu",
     Url = "https://blog.johnwu.cc"
    },
    License = new License
    {
     Name = "西西 CC BY-NC-SA 4.0",
     Url = "https://creativecommons.org/licenses/by-nc-sa/4.0/"
    }
   }
  );
  // 為 Swagger JSON and UI設置xml文檔註釋路徑
  var basePath = Path.GetDirectoryName(typeof(Program).Assembly.Location);//獲取應用程序所在目錄(絕對,不受工作目錄影響,建議採用此方法獲取路徑)
  var xmlPath = Path.Combine(basePath, "Swagger.xml");
  c.IncludeXmlComments(xmlPath);
 });
 #endregion 註冊 Swagger
}
點選「屬性」「建置」
新增「隱藏警告」1591
新增「XML 文件檔案」程式碼設定 Swagger.xml 這邊也填入 Swagger.xml

設定 Startup.cs 的 Configure
public void Configure(IApplicationBuilder app, IHostingEnvironment env)
{

 #region 註冊 Swagger
 // 註冊 Swagger
 app.UseSwagger();
 app.UseSwaggerUI(c =>
 {
  c.SwaggerEndpoint(
   // url: 需配合 SwaggerDoc 的 name。 "/swagger/{SwaggerDoc name}/swagger.json"
   url: "/swagger/v1/swagger.json",
   // name: 用於 Swagger UI 右上角選擇不同版本的 SwaggerDocument 顯示名稱使用。
   name: "RESTful API v1.0.0"
  );
 });
 #endregion 註冊 Swagger

 app.UseMvc(routes =>
 {
  routes.MapRoute(name: "default", template: "{controller}/{action}/{id?}");
 });

}
就能開啟 Swagger UI 網頁
PS.在 Blazor 安裝 Swagger 後,
在 Ubuntu 上執行有異常(收不到封包),
最後換了 NSwag 才正常
2019年5月8日 星期三
ASP.NET Core 的內建 DI
以讀取預設的 appsetting.json 為例
{
  "Logging": {
    "LogLevel": {
      "Default": "Warning"
    }
  }
}
public class MySetting
{
    public Logging Logging { get; set; }
}

public class Logging
{
    public LogLevel LogLevel { get; set; }
}

public class LogLevel
{
    public string Default { get; set; }
}
public void ConfigureServices(IServiceCollection services)
{
    services.Configure<mysetting>(Configuration);

    services.AddMvc().SetCompatibilityVersion(CompatibilityVersion.Version_2_1);
}
public class HomeController : Controller
{
    private IOptions<mysetting> myOption;

    public HomeController(IOptions<mysetting> _option)
    {
        myOption = _option;
    }
}
2019年2月26日 星期二
ASP.NET Core (包含 .NET Core)如何超簡單讀取客制化 json 檔案
利用 ConfigurationBuilder 就可以讀取客制化的 Json 檔案
                // 讀取客制化 Json 檔案
                // Json 檔案格為 appsettings.[目前組態].json
                string appsettingJson_ = $"appsettings.{DebuggingProperties.Config}.json";

                // 讀取目錄內客制化的 Json 檔案
                _config = new ConfigurationBuilder()
                .SetBasePath(Directory.GetCurrentDirectory())
                .AddJsonFile(appsettingJson_, optional: true)
                .Build();
2019年2月25日 星期一
ASP.NET Core (包含 .NET Core)依據組態為 Release 或 Debug 取得各自的設定內容
首先取得目前的組態,如下列的程式碼:
原理可以參考這篇:怎樣判斷 .NET Core (包含 ASP.NET Core)是 Debug 或 Release ?
原理可以參考這篇:怎樣判斷 .NET Core (包含 ASP.NET Core)是 Debug 或 Release ?
    public static class DebuggingProperties
    {
        ///
        /// 檢查當前正在運行的程式組態。
        ///
        public static string Config
        {
            get
            {
                if (_ConfigAttribute == null)
                {
                    var assembly = Assembly.GetEntryAssembly();
                    if (assembly == null)
                    {
                        // 由於調用 GetFrames 的 StackTrace 實例沒有跳過任何幀,所以 GetFrames() 一定不為 null。
                        assembly = new StackTrace().GetFrames().Last().GetMethod().Module.Assembly;
                    }

                    var assemblyConfigurationAttribute = assembly.GetCustomAttribute();
                    _ConfigAttribute = assemblyConfigurationAttribute.Configuration;
                }

                return _ConfigAttribute;
            }
        }

        private static string _ConfigAttribute;
    }
{
  "Release": {
    "DefaultConnection": " Release Server"
  },
  "Debug": {
    "DefaultConnection": "Debug Server"
  }
}
            public IConfiguration _config { get; }

// 取的 appsettings.json 的設定
public Startup(IConfiguration configuration)
{
    _config = configuration;
}


// 執行中取得組態設定的方式
public void Run()
{
    // 取的 appsettings.json 的 Release 或 Debug 組態設定
    var cfg_ = _config.GetSection(DebuggingProperties.Config);
    // 取的 appsettings.json 指定組態設定內容
    string def_ = cfg_ .GetValue("DefaultConnection");
            }
2019年2月22日 星期五
怎樣判斷 .NET Core (包含 ASP.NET Core)是 Debug 或 Release ?
用 JustDecompile 可以看到 DLL 的資訊
下面是 Debug 版本的資訊 :

下面是 Release 版本的資訊 :
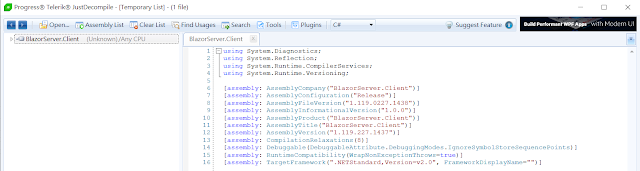 這樣我們可以用下面的程式碼,判斷 DLL 是否為 Debug 版本。

下面是 Debug 版本的資訊 :

下面是 Release 版本的資訊 :
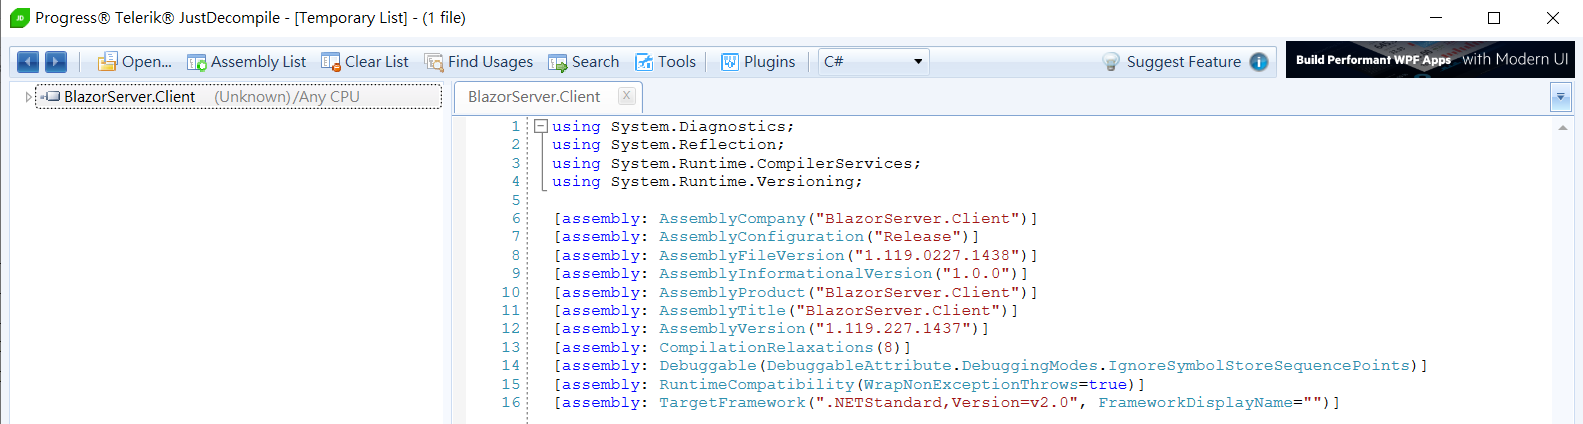

2019年2月20日 星期三
升級 dotnet core 3.0 造成 Blazor for dotnet core 2.1 無法執行的問題解決
編譯後在 ubuntu 上執行發生錯誤訊息:
It was not possible to find any compatible framework version
The specified framework 'Microsoft.AspNetCore.App', version '2.1.8' was not found.

原因是 AspNetCore 預設使用 2.1.8
而 Blazor 只能在 2.1.7 上正常執行
解決方法是修改 Visual Studio 的 *.csproj
指定 AspNetCore 的版本號為 2.1.7
PackageReference Include="Microsoft.AspNetCore.App"

修改設定指定版本為 2.1.7
(AWS EC2 預設 Image 為 2.1.2 改成 2.1.2 試過可以正常執行)
PackageReference Include="Microsoft.AspNetCore.App" Version="2.1.7"

重新編譯後的新版本就能正常的執行了
PS.如果在 Visual Studio 2017 出現錯誤訊息:
Unhandled Exception: System.IO.FileLoadException: Could not load file or assembly 'Microsoft.AspNetCore, Version=2.1.7.0, Culture=neutral, PublicKeyToken=adb9793829ddae60'. The located assembly's manifest definition does not match the assembly reference. (Exception from HRESULT: 0x80131040)
只要把剛剛的修改還原就能 Debug 了。
It was not possible to find any compatible framework version
The specified framework 'Microsoft.AspNetCore.App', version '2.1.8' was not found.

原因是 AspNetCore 預設使用 2.1.8
而 Blazor 只能在 2.1.7 上正常執行
解決方法是修改 Visual Studio 的 *.csproj
指定 AspNetCore 的版本號為 2.1.7
PackageReference Include="Microsoft.AspNetCore.App"

修改設定指定版本為 2.1.7
(AWS EC2 預設 Image 為 2.1.2 改成 2.1.2 試過可以正常執行)
PackageReference Include="Microsoft.AspNetCore.App" Version="2.1.7"

重新編譯後的新版本就能正常的執行了
PS.如果在 Visual Studio 2017 出現錯誤訊息:
Unhandled Exception: System.IO.FileLoadException: Could not load file or assembly 'Microsoft.AspNetCore, Version=2.1.7.0, Culture=neutral, PublicKeyToken=adb9793829ddae60'. The located assembly's manifest definition does not match the assembly reference. (Exception from HRESULT: 0x80131040)
只要把剛剛的修改還原就能 Debug 了。
2019年2月11日 星期一
透過 supervisord 執行 .NET Core 程式
利用 WinSCP 將自己開發的 .NET Core 程式上傳到 Ubuntu 上,
再透過 PuTTY 執行 .NET Core 程式,當 PuTTY 關閉後,
.NET Core 程式也會關閉。
所以我需要利用 supervisord 來管理 .NET Core 程式,
在 PuTTY 關閉後,也能正常運行。
在 Ubuntu 安裝 supervisord
先執行 sudo su 換 root 權限
apt-get update
apt-get install -y supervisor

安裝完,輸入 service supervisor status 看看是否安裝成功。

編輯 supervisor 設定檔
先執行 sudo su 換 root 權限
vim /etc/supervisor/supervisord.conf
進入 vim 修改 supervisord.conf 檔案

按下 i (-- INSERT --)
新增 supervisor 設定
[program:你的程式]
command=/usr/bin/dotnet /home/使用者/你的程式目錄/你的程式.dll
directory=/home/使用者/你的程式目錄/
user =root
autostart=true
autorestart=true
startsecs=3
stderr_logfile=/tmp/你的程式_err.log
stdout_logfile=/tmp/你的程式.log
environment=ASPNETCORE__ENVIRONMENT=Production
或直接指定路徑
command=/usr/share/dotnet/dotnet /home/你的程式目錄/你的程式.dll
PS. dotnet 安裝路徑可以用 dotnet --info 查到
輸入 :wq 存檔後,用指令重新啟動 supervisord
supervisorctl reload
輸入 service supervisor status 看看是否設定成功
用 supervisor 啟動你的程式
supervisorctl start 你的程式
或直接指定路徑
command=/usr/share/dotnet/dotnet /home/你的程式目錄/你的程式.dll
PS. dotnet 安裝路徑可以用 dotnet --info 查到
輸入 :wq 存檔後,用指令重新啟動 supervisord
supervisorctl reload
輸入 service supervisor status 看看是否設定成功
用 supervisor 啟動你的程式
supervisorctl start 你的程式
2019年1月25日 星期五
Blazor 在 Ubuntu 一執行就當機的解決方法
Blazor 官方有這個 Bug 回報
Update to SDK 2.2.100 throws "An item with the same key has already been added. Key: .wasm" #5666
https://github.com/aspnet/AspNetCore/issues/5666

看起來,官方 .NET Core 3.0 才有機會修正此問題,
只好另求他法,我自己測試過只要把 Ubuntu 的 .NET Core 版本降到 2.1
Microsoft.AspNetCore.App 2.1.7 或 2.1.2 (AWS EC2 預設版本)
就可以正常執行了。
Update to SDK 2.2.100 throws "An item with the same key has already been added. Key: .wasm" #5666
https://github.com/aspnet/AspNetCore/issues/5666

看起來,官方 .NET Core 3.0 才有機會修正此問題,
只好另求他法,我自己測試過只要把 Ubuntu 的 .NET Core 版本降到 2.1
Microsoft.AspNetCore.App 2.1.7 或 2.1.2 (AWS EC2 預設版本)
就可以正常執行了。
2019年1月22日 星期二
在 Ubuntu 上 Blazor 為安裝 .NET Core 2.1.503 (ASP.NET Core 2.1.7)
因為 Blazor 只支援到 ASP.NET Core 2.1.7
(PS.試過 AWS EC2 預設 ASP.NET Core 2.1.2 也能正常執行 2.1.302 版)
所以不抓最新版 2.1.504
而是抓 2.1.503 版
先執行 sudo su 換 root 權限(輸入 cd $HOME 是否在要安裝的目錄上,不是才需要換 root)
並且 sudo apt-get install 的安裝方式,隨著版本推進,會有很多錯誤發生。
所以採用抓取 .NET Core Binaries 2.1.503 版的檔案,還進行更新,網址如下:
https://dotnet.microsoft.com/download/thank-you/dotnet-sdk-2.1.503-linux-x64-binaries

需要其他版本可以在這邊下載適合的 .NET Core Binaries 檔案,網址如下:
https://dotnet.microsoft.com/download/dotnet-core/2.1

在 dotnet-sdk-2.1.503-linux-x64.tar.gz 目錄下執行下面的指令:
先執行 sudo su 換 root 權限
mkdir -p $HOME/dotnet && tar zxf dotnet-sdk-2.1.503-linux-x64.tar.gz -C $HOME/dotnet
export DOTNET_ROOT=$HOME/dotnet
export PATH=$PATH:$HOME/dotnet
執行 dotnet --info 驗證是否安裝成功
 關閉 Session 後
下次登入如果因為 export 沒有 DOTNET_ROOT
(目前有遇到 WSL 關閉後前面的 export 會消失)
而無法執行 dotnet

可以用 vim /etc/profile(先執行 sudo su 換 root 權限)

修改系統檔案都要用 root 權限
先執行 sudo su 換 root 權限
然後
按下 i (-- INSERT --)
在 profile 檔案末端加上
export DOTNET_ROOT=$HOME/dotnet
export PATH=$PATH:$HOME/dotnet
如果一樣無法執行 dotnet
可以用指令測試一下是否能直接執行 dotnet
通常是 /usr/share/dotnet/dotnet
如果可執行
就可以改成絕對路徑
export DOTNET_ROOT=/usr/share/dotnet
export PATH=$PATH:/usr/share/dotnet
重新登入後,試試看是否能正常執行 dotnet
輸入 :wq
離開 vim 編輯
輸入 . /etc/profile 重新載入 profile 檔案
就能在任何目錄上呼叫 dotnet 了
(PS.試過 AWS EC2 預設 ASP.NET Core 2.1.2 也能正常執行 2.1.302 版)
所以不抓最新版 2.1.504
而是抓 2.1.503 版
先執行 sudo su 換 root 權限(輸入 cd $HOME 是否在要安裝的目錄上,不是才需要換 root)
並且 sudo apt-get install 的安裝方式,隨著版本推進,會有很多錯誤發生。
所以採用抓取 .NET Core Binaries 2.1.503 版的檔案,還進行更新,網址如下:
https://dotnet.microsoft.com/download/thank-you/dotnet-sdk-2.1.503-linux-x64-binaries
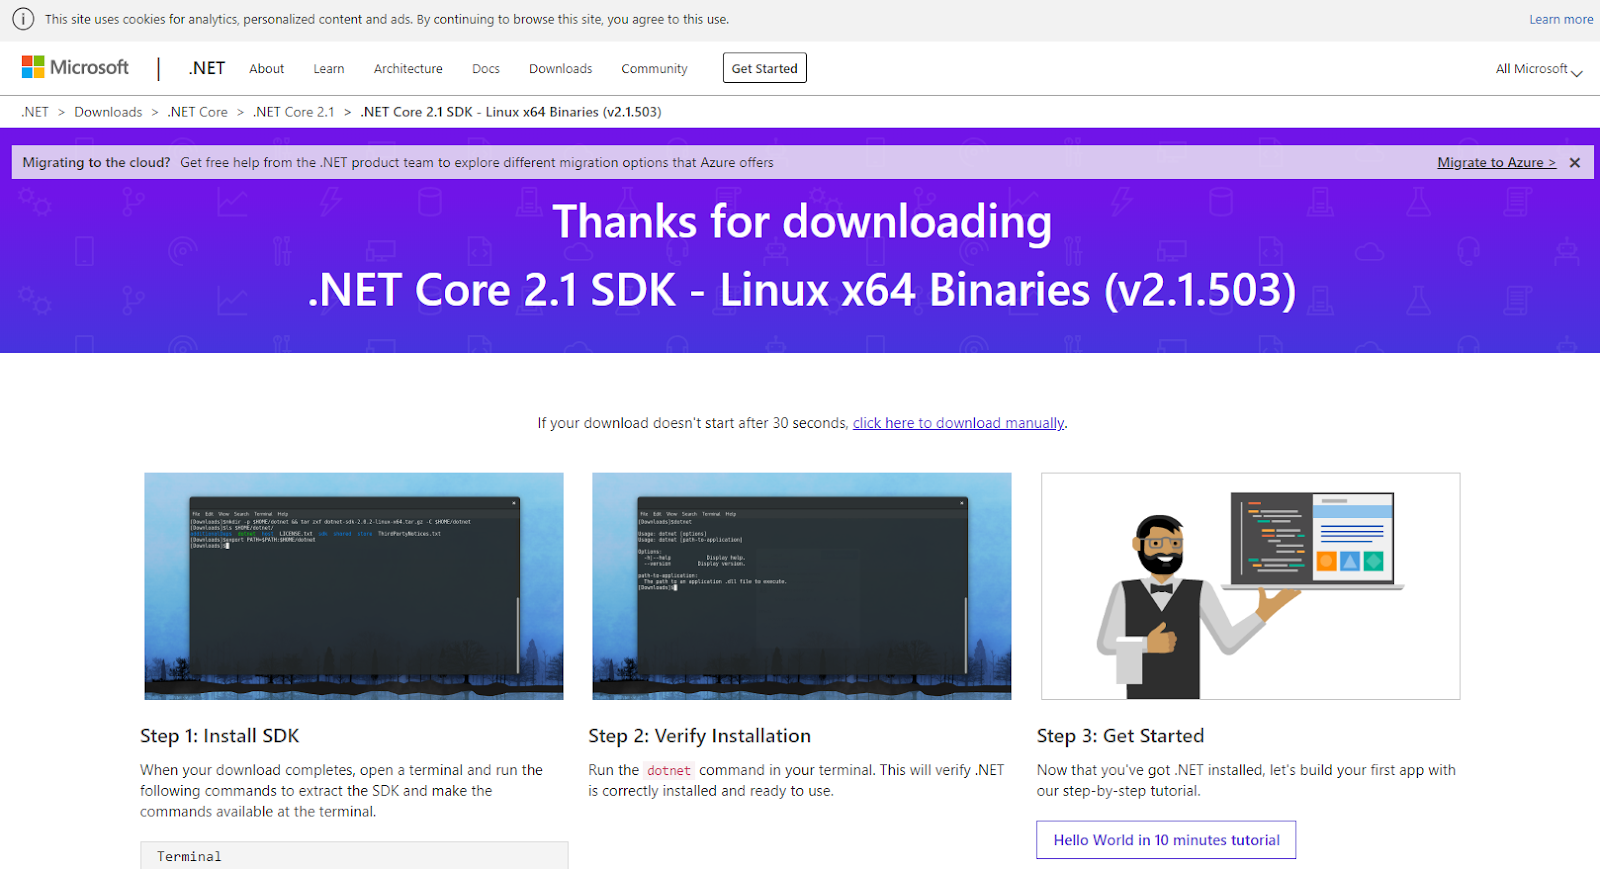
需要其他版本可以在這邊下載適合的 .NET Core Binaries 檔案,網址如下:
https://dotnet.microsoft.com/download/dotnet-core/2.1

在 dotnet-sdk-2.1.503-linux-x64.tar.gz 目錄下執行下面的指令:
先執行 sudo su 換 root 權限
mkdir -p $HOME/dotnet && tar zxf dotnet-sdk-2.1.503-linux-x64.tar.gz -C $HOME/dotnet
export DOTNET_ROOT=$HOME/dotnet
export PATH=$PATH:$HOME/dotnet
執行 dotnet --info 驗證是否安裝成功

下次登入如果因為 export 沒有 DOTNET_ROOT
(目前有遇到 WSL 關閉後前面的 export 會消失)
而無法執行 dotnet

可以用 vim /etc/profile(先執行 sudo su 換 root 權限)

修改系統檔案都要用 root 權限
先執行 sudo su 換 root 權限
然後
按下 i (-- INSERT --)
在 profile 檔案末端加上
export DOTNET_ROOT=$HOME/dotnet
export PATH=$PATH:$HOME/dotnet
如果一樣無法執行 dotnet
可以用指令測試一下是否能直接執行 dotnet
通常是 /usr/share/dotnet/dotnet
如果可執行
就可以改成絕對路徑
export DOTNET_ROOT=/usr/share/dotnet
export PATH=$PATH:/usr/share/dotnet
重新登入後,試試看是否能正常執行 dotnet
輸入 :wq
離開 vim 編輯
輸入 . /etc/profile 重新載入 profile 檔案
就能在任何目錄上呼叫 dotnet 了
訂閱:
文章 (Atom)
-
 最近電腦沒在操作,CPU 風扇一直高速在運轉,查了一下工作管理員,發現 WMI Provider Host 一直占用著 CPU。 檢查一下「事件檢視器」應用程式及服務紀錄檔\Microsoft\Windows\WMI-Activity\Poerational,發現有錯誤一...
 -
當無法修復或解除安裝 Visual Studio 時, 可以透過 InstallCleanup.exe 工具來移除所有安裝的 Visual Studio。 InstallCleanup.exe 工具所在的目錄: C:\Program Files (x86)\Micros...