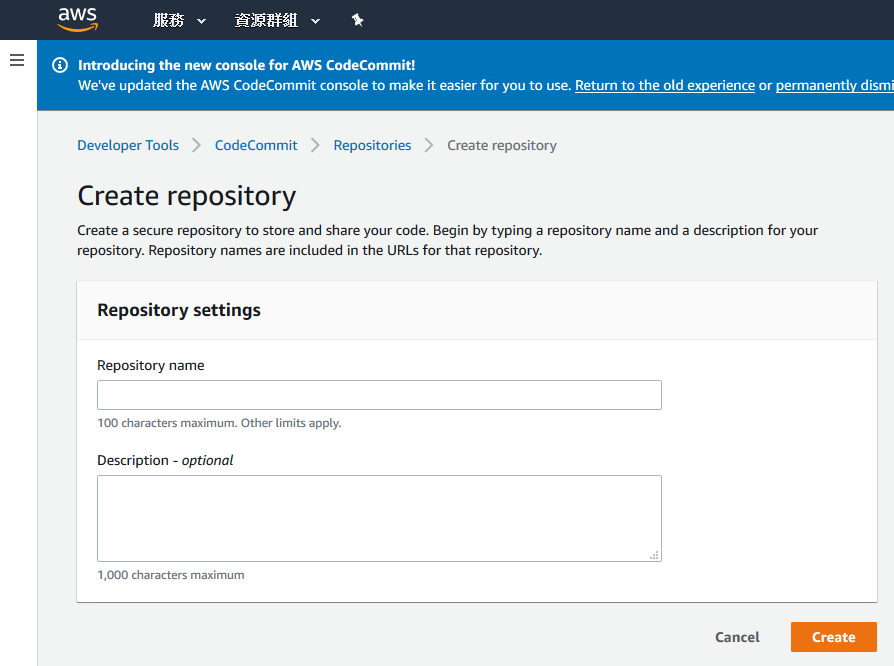
2019年5月29日 星期三

AWS 的 Code Commit 修改

新建使用一段時間的 Code Commit
如果想修改說明
可以點入專案 Repositories

左邊有 Settings 選項
請點擊


進入 Settings
右邊就會列出可以修改的內容


一般軟體階段介紹與說明

Alpha
此版本重點在實踐主要功能,做為內部意見交流所用,Bug 比較多,但不是此階段的重點。

Beta
此版本承接 Alpha 版本,消除了嚴重的 Bug,重點會放在 UI 的使用體驗。

 RC / Preview
基本上沒太多 Bug,為發行前的最後一版。
 PS. RC 是 Release Candidate (發行 候選)的縮寫

Release / Final
發行版本,是交付給使用者的版本。

Visual Studio 版本號介紹與說明

Visual Studio 一般常見的版本號樣式


是以 1.2.3.4 的樣式呈現

對應在英文上

為 Major(1).Minor(2).Build(3).Revision(4)


現在針對每個欄位的意義

做一個簡單的說明


Major

通常是大更新,使的程式無法向下相容,這個版號會遞增


Minor

也是大更新,但是程式可以向下相容,這個版號會遞增


Build

通常是一些小更新,例如:修正 Bug,這個版號會遞增

PS.這個欄位也有人用更新日期代表


Revision

通常是內部版本,或修正安全性漏洞,這個版號會遞增


Visual Studio 2017 發佈後,執行批次檔(配合 pscp、plink 一鍵更新遠端 Ubuntu 伺服器檔案)

首先先要設定完發佈設定檔 FolderProfile.pubxml

再來修改檔案內容


  <Target Name="ExecuteBatAfterPublish" AfterTargets="AfterPublish">
    <Exec Command="C:\Batch\WinToUbuntu.bat" WorkingDirectory="$(publishUrl)" />
  </Target>


PS.記得 *.bat 檔案檔案屬性要選「永遠複製」不然執行階段會出現找不到批次檔的訊息


還有 *.bat 檔案在專案編譯後在根目錄下 Exec Command=WinToUbuntu.bat 可以不需要 *.bat 路徑。

批次檔內可以利用上次提到的 pscp 將檔案複製到遠端的 Ubuntu 伺服器內
就能做到一鍵發佈並更新遠端 Ubuntu 檔案
例如:
pscp -i "C:/ppk/ubuntu.ppk" -pw password *.* user@1.2.3.4:/home

plink 可以執行遠端的 Ubuntu 指令
例如:
plink -ssh -i ubuntu.ppk user@1.2.3.4 -pw password cd /home; ls;

PS.
1.寫完 *.bat 檔案,記得實際操作 pscp 與 plink 指令測試一次,這樣 Register 會記錄過授權記錄, *.bat 才能正常執行。

2.Windows 10 安裝 PuTTY 後,pscp 與 plink 的路徑會被引用,所以不需要複製 pscp 與 plink 的執行檔。


利用 pscp、plink 將 Windows 10 的檔案複製到 Ubuntu 指定目錄中

安裝 PuTTY 會有 pscp 、plink 執行檔,pscp  可以用來複製檔案到遠端的 Ubuntu 上

plink 可以執行遠端 Ubuntu 的命令

pscp  指令如下:
pscp -i "C:/ppk/ubuntu.ppk" -pw password *.* user@1.2.3.4:/home

上列指令目的:
複製 "C:/linux-x64/*.*" 的檔案到遠端 IP : 1.2.3.4 的 Ubuntu 目錄 /home 下

說明:
-i 讀取 ppk 路徑(EC2 預設都需要 ppk)
-pw Ubuntu 密碼
user@ 是指帳戶名稱加上@

plink 指令如下:
plink -ssh -i ubuntu.ppk user@1.2.3.4 -pw password cd /home; ls;

上列指令目的:
登入遠端 IP:1.2.3.4 的 Ubuntu 執行 cd /home 與 ls

說明:
-i 讀取 ppk 路徑(EC2 預設都需要 ppk)
-pw Ubuntu 密碼
user@ 是指帳戶名稱加上@

2019年5月28日 星期二

ASP.NET Core WebAPI 中的分析工具 MiniProfiler

NuGet 安裝 MiniProfiler.AspNetCore.Mvc


在 Startup.cs 上新增程式碼


public void ConfigureServices(IServiceCollection services)
{
 services.AddMvc();


 #region Register the MiniProfiler services

 services.AddMiniProfiler(options => options.RouteBasePath = "/profiler");

 #endregion Register the MiniProfiler services
 
 ....
}

public void Configure(IApplicationBuilder app, IHostingEnvironment env)
{
 app.UseResponseCompression();

 if (env.IsDevelopment())
 {
  app.UseDeveloperExceptionPage();
 }


 #region Register the MiniProfiler

 app.UseMiniProfiler();

 #endregion Register the MiniProfiler

}


在 xxxxController 新增測試碼


[HttpGet]
public IEnumerable Get()
{
 string url1 = string.Empty;
 string url2 = string.Empty;
 using (MiniProfiler.Current.Step("Get方法"))
 {
  using (MiniProfiler.Current.Step("準備數據"))
  {
   using (MiniProfiler.Current.CustomTiming("SQL", "SELECT * FROM Config"))
   {
    // 模擬一個SQL查詢
    Thread.Sleep(500);

    url1 = "https://www.baidu.com";
    url2 = "https://www.sina.com.cn/";
   }
  }


  using (MiniProfiler.Current.Step("使用從數據庫中查詢的數據,進行Http請求"))
  {
   using (MiniProfiler.Current.CustomTiming("HTTP", "GET " + url1))
   {
    var client = new WebClient();
    var reply = client.DownloadString(url1);
   }

   using (MiniProfiler.Current.CustomTiming("HTTP", "GET " + url2))
   {
    var client = new WebClient();
    var reply = client.DownloadString(url2);
   }
  }
 }
 return new string[] { "value1", "value2" };
}


在瀏覽器上輸入 http://localhost:port/api/xxxx 可呼叫此程式


執行完畢

在 http://localhost:port/profiler/results 可以看到 MiniProfiler


2019年5月25日 星期六

ASP.NET Core 安裝 NSwag 自動產生 API 說明文件檔案

目的:自動抓取註解產生下面的 API 說明文件網頁


上次講到 Swashbuckle 在 Ubuntu 環境,
專案執行發生異常,
於是就換了 NSwag,
目前執行下來沒什麼問題,
這邊記錄一下安裝的過程與要注意的事項。


安裝 NuGet 套件:
NSwag.AspNetCore                                  NSwag 主要套件
NSwag.SwaggerGeneration.AspNetCore 自動從 cs 抓註解到我們指定的 xml 檔案


新增「隱藏警告:1591」

PS.特別要注意 xml 檔案名稱要跟專案一樣,才能自動抓取到註解內容


先引用 NSwag.AspNetCore


using NSwag.AspNetCore;


設定一下 Startup.cs 的 ConfigureServices


public void ConfigureServices(IServiceCollection services)
{
 services.AddMvc();


 #region Register the Swagger services

 // Register the Swagger services
 services.AddSwaggerDocument();

 #endregion Register the Swagger services
}


與設定一下 Startup.cs 的 Configure


public void Configure(IApplicationBuilder app, IHostingEnvironment env)
{


       #region Register the Swagger generator and the Swagger UI middlewares

       // Register the Swagger generator and the Swagger UI middlewares
 
        app.UseSwagger();
        app.UseSwaggerUi3();

        #endregion Register the Swagger generator and the Swagger UI middlewares


        app.UseMvc(routes =>
        {
             routes.MapRoute(name: "default", template: "{controller}/{action}/{id?}");
        });
}


記得註解 <summary> 要寫,每次編譯後 XML 的內容都會更新唷!


/// <summary>
/// 簡單的 Controller 範例
/// </summary>


程式開啟後,輸入網址 http://localhost:port/swagger
就能開啟 Swagger UI 網頁


2019年5月23日 星期四

c# async 和 await 簡易說明

函式前面增加 async 就會成為異步函式(執行過程中不會等待函式執行完畢才往下跑)


/// <summary>
/// 異步函式
/// </summary>
static async void AsyncFun()
{
 // 裡面要有 await 關鍵字

 // await 後面要接回傳 Task 的函式
 // 因為回傳 Task 簡稱他為異步任務

 List<formatter> f_ = new List<formatter>{
  new Formatter("「異步任務」", Color.Red)};

 Print("執行 {0} 『開始』", Color.Yellow, f_.ToArray());
 bool ret_ = await DelayFun();
 Print("執行 {0} 『結束』", Color.Yellow, f_.ToArray());
}


異步函式內需要有await 關鍵字
await 後面要接回傳 Task 的函式
因為回傳 Task 簡稱他為異步任務


/// <summary>
/// 異步任務
/// </summary>
/// <returns>true</returns>
static Task<bool> DelayFun()
{
 return Task.Run(() =>
 {
  List<Formatter> f_ = new List<Formatter>{
   new Formatter("等待五秒", Color.YellowGreen)};

  Print("{0} 開始", Color.Red, f_.ToArray());
  Thread.Sleep(5000);
  Print("{0} 結束", Color.Red, f_.ToArray());
  return true;
 });
}


異步函式呼叫與一般函式一樣
只差在執行中不等待函式執行完


static void Main(string[] args)
{
 ....
 // 異步函式
 List<Formatter> f0_ = new List<Formatter>{
  new Formatter("「異步函式」", Color.Red)};
 Print("執行 {0} 開始", Color.Green, f0_.ToArray());
 AsyncFun();
 Print("執行 {0} 結束", Color.Green, f0_.ToArray());
 ....
}


最後可以看到「異步任務」
在程式執行完畢後
才把任務跑完


利用 .NET Standard 函式庫 的 C# 取得 Git 版本號


這邊遇到找不到 Git 的環境變數
所以在 @"Git\cmd" 做了一些修改
這邊得看看你 Git 的執行檔在那個目錄內
再做調整與修改


public class CommitID
{
 private static string EnvironmentVariable
 {
  get
  {
   string sPath = Environment.GetEnvironmentVariable("Path");
   var result = sPath.Split(';');
   for (int i = 0; i < result.Length; i++)
   {
    if (result[i].Contains(@"Git\cmd"))
    {
     sPath = result[i];
    }

   }
   return sPath;
  }
 }

 public static void GetCommitID()
 {
  string gitPath = System.IO.Path.Combine(EnvironmentVariable, "git.exe");
  Console.WriteLine($"環境路徑:{gitPath}");
  Process p = new Process();
  p.StartInfo.FileName = gitPath;
  p.StartInfo.Arguments = "rev-parse HEAD";
  p.StartInfo.CreateNoWindow = true;
  p.StartInfo.UseShellExecute = false;
  p.StartInfo.RedirectStandardOutput = true;
  p.OutputDataReceived += OnOutputDataReceived;
  p.Start();
  p.BeginOutputReadLine();
  p.WaitForExit();
 }

 private static void OnOutputDataReceived(object sender, DataReceivedEventArgs e)
 {
  if (e != null && !string.IsNullOrEmpty(e.Data))
  {
   ID = e.Data;

   Console.WriteLine(e.Data);
  }
 }

 public static string ID { get; set; } = "";
}


使用方法:
先呼叫 GetCommitID()
之後 ID 就會有 Git 的版本號
他會取得目前執行目錄上的 Git 版本號


Visual Studio 2017利用 T4 自動產生版本號(寫入 Git 版本號)


「工具」 「擴充功能與更新」

安裝「T4Executer 」後 T4 的關鍵字都會有對應的顏色標示


安裝 「Devart T4 Editor」可以設定編譯前先執行 T4 範本


設定編譯前執行 T4 (圖為執行狀態)


設定畫面


新建文字檔 附檔名為 *.tt
就會出現「轉換所有 T4 範本」
點擊就會執行 T4 範本


首先註解 AssemblyInfo.cs 裡面的
[assembly: AssemblyFileVersion("0.0.0.0")]

[assembly: AssemblyTitle("ConsoleApp")]
下面的 SharedInfo.tt 檔案(T4 範例)
會自動產生一個 SharedInfo.cs
並自動填入
[assembly: AssemblyFileVersion("0.0.0.0")]

[assembly: AssemblyTitle("ConsoleApp")]
的內容


<#@ template debug="false" hostspecific="true" language="C#" #>
<#@ import namespace="System.IO" #>
<#@ assembly name="$(SolutionDir)\CommitID\bin\Debug\netstandard2.0\MyLibrary.Git.dll" #>
<#@ import namespace="MyLibrary.Git" #>
<#@ assembly name="C:\Program Files\dotnet\sdk\2.1.700-preview-009597\Microsoft\Microsoft.NET.Build.Extensions\net461\lib\netstandard.dll" #>
<#@ output extension=".cs" #>
<#
     int major = 0; 
     int minor = 0; 
     int build = 0; 
     int revision = 0; 
  
     try
     {
         using(var f = File.OpenText(Host.ResolvePath("SharedInfo.cs")))
         {
             // 取值做 +1 使用
             //string maj = f.ReadLine().Replace("//","");
             //string min = f.ReadLine().Replace("//","");
             //string b   = f.ReadLine().Replace("//","");
             //string r   = f.ReadLine().Replace("//","");
  
             // 轉成日期
             string maj = DateTime.Now.Year.ToString();
             string min = DateTime.Now.Month.ToString();
             string b   = DateTime.Now.Day.ToString();
             string r   = DateTime.Now.Minute.ToString() + "0" + DateTime.Now.Second.ToString();

             major    = int.Parse(maj); 
             minor    = int.Parse(min); 
             build    = int.Parse(b); 
             revision = int.Parse(r) + 1; 
         }
     }
     catch
     {
         major    = 1; 
         minor    = 0; 
         build    = 0; 
         revision = 255; 
     }

    // 呼叫自己個函式庫
 CommitID.GetCommitID();
 string gitver = CommitID.ID;
 #>
 //<#= major #>
 //<#= minor #>
 //<#= build #>
 //<#= revision #>

 //<#= gitver #>

 // 
 // This code was generated by a tool. Any changes made manually will be lost
 // the next time this code is regenerated.
 // 
  
 using System.Reflection;
  
 [assembly: AssemblyFileVersion("<#= major #>.<#= minor #>.<#= build #>.<#= revision #>")]
 [assembly: AssemblyTitle("<#= gitver #>")]


MyLibrary.Git 是我寫的 .NET Standard Library
透過


<#@ assembly name="$(SolutionDir)\CommitID\bin\Debug\netstandard2.0\MyLibrary.Git.dll" #>
<#@ import namespace="MyLibrary.Git" #>


使用 .NET Standard Library 還要加入 .NET Standard 的 dll


<#@ assembly name="C:\Program Files\dotnet\sdk\2.1.700-preview-009597\Microsoft\Microsoft.NET.Build.Extensions\net461\lib\netstandard.dll" #>


不然編譯會有錯誤訊息:
錯誤 正在編譯轉換: 類型 'Object' 定義在未參考的組件中。您必須加入組件 'netstandard, Version=2.0.0.0, Culture=neutral, PublicKeyToken=cc7b13ffcd2ddd51' 的參考。

請依據自己的 dotnet 版本選擇目錄,例如:我的是 net461


2019年5月22日 星期三

Visual Studio 2017 / 2019 自動產生版本號 Automatic Version 2

在「擴充功能與更新」安裝 Automatic Version 2


「工具」欄位會多一個 「Automatic Version Setting」


設定一下版本號的規則
記得先指定 「Custom System Version」
左邊如果選的是「User's Global Default」
皆下來每個專案都會自動產生版本號
一般都會指定專案(左邊最下面的那個)
做自動生產專案設定


接下來編譯就會自動更新版本號了


Visual Studio Code 的 cs 檔案中文亂碼解決方法

點擊右下編碼


選擇『以編碼重新開啟』


選擇『Traditional Chinese (Big5) cp950』
這時文件內的中文就會正常顯顯示了


因為 Visual Studio Code 開啟檔案預設是 UTF-8
所以要避免每次都要設定『Traditional Chinese (Big5) cp950』
選擇『以編碼儲存』


選擇 UTF-8 下次打開檔案就能正常顯示中文了


Visual Studio Code 調整顯示字體大小

在「設定」中輸入

editor.fontsize
如下圖框內調整字體大小


PS、目前不支援Ctrl + mouse scroll up/down 調整字體大小
Ctrl + 放大字體
Ctrl - 縮小字體


2019年5月18日 星期六

ASP.NET Core 安裝 Swashbuckle 自動產生 API 說明文件檔案

目的:自動抓取註解產生下面的 API 說明文件網頁


NuGet 安裝 Swashbuckle.AspNetCore


引用 Swashbuckle.AspNetCore.Swagger


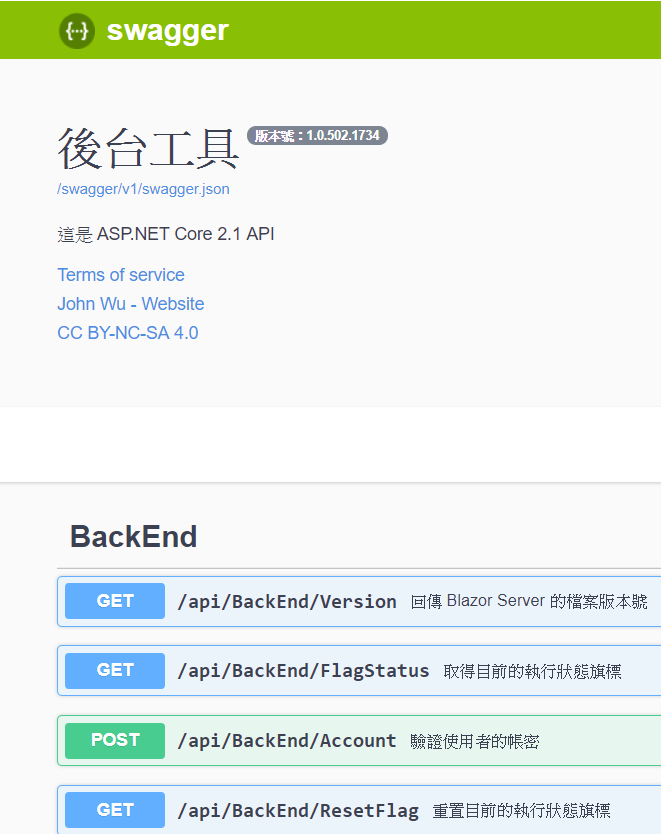
using Swashbuckle.AspNetCore.Swagger;

設定 Startup.cs 的 ConfigureServices

public void ConfigureServices(IServiceCollection services)
{
 services.AddMvc();
 
 #region 註冊 Swagger
 // 註冊 Swagger
 services.AddSwaggerGen(c =>
 {
  c.SwaggerDoc(
   // name: 攸關 SwaggerDocument 的 URL 位置。
   name: "v1",
   // info: 是用於 SwaggerDocument 版本資訊的顯示(內容非必填)。
   info: new Info
   {
    Title = "標題",
    Version = "版本號 1.0.0",
    Description = "說明",
    TermsOfService = "無",
    Contact = new Contact
    {
     Name = "強尼 John Wu",
     Url = "https://blog.johnwu.cc"
    },
    License = new License
    {
     Name = "西西 CC BY-NC-SA 4.0",
     Url = "https://creativecommons.org/licenses/by-nc-sa/4.0/"
    }
   }
  );
  // 為 Swagger JSON and UI設置xml文檔註釋路徑
  var basePath = Path.GetDirectoryName(typeof(Program).Assembly.Location);//獲取應用程序所在目錄(絕對,不受工作目錄影響,建議採用此方法獲取路徑)
  var xmlPath = Path.Combine(basePath, "Swagger.xml");
  c.IncludeXmlComments(xmlPath);
 });
 #endregion 註冊 Swagger
}


點選「屬性」「建置」
新增「隱藏警告」1591
新增「XML 文件檔案」程式碼設定 Swagger.xml 這邊也填入 Swagger.xml


設定 Startup.cs 的 Configure

public void Configure(IApplicationBuilder app, IHostingEnvironment env)
{

 #region 註冊 Swagger
 // 註冊 Swagger
 app.UseSwagger();
 app.UseSwaggerUI(c =>
 {
  c.SwaggerEndpoint(
   // url: 需配合 SwaggerDoc 的 name。 "/swagger/{SwaggerDoc name}/swagger.json"
   url: "/swagger/v1/swagger.json",
   // name: 用於 Swagger UI 右上角選擇不同版本的 SwaggerDocument 顯示名稱使用。
   name: "RESTful API v1.0.0"
  );
 });
 #endregion 註冊 Swagger

 app.UseMvc(routes =>
 {
  routes.MapRoute(name: "default", template: "{controller}/{action}/{id?}");
 });

}
   
程式開啟後,輸入網址 http://localhost:port/swagger
就能開啟 Swagger UI 網頁


PS.在 Blazor 安裝 Swagger 後,
在 Ubuntu 上執行有異常(收不到封包),
最後換了 NSwag 才正常


2019年5月14日 星期二

AWS 「CodeCommit」 的「Create repository」

點擊「Create repository」


填寫 Repository Name 與 Description
然後按下「Create」


點擊 Clone URL 欄位下的 HTTPS
可以複製 Git 的 Url

2019年5月8日 星期三

ASP.NET Core 的內建 DI

以讀取預設的 appsetting.json 為例


{
  "Logging": {
    "LogLevel": {
      "Default": "Warning"
    }
  }
}


建立存放 appsetting.json 的類別 MySetting.cs


public class MySetting
{
    public Logging Logging { get; set; }
}

public class Logging
{
    public LogLevel LogLevel { get; set; }
}

public class LogLevel
{
    public string Default { get; set; }
}


在 Startup.cs 的 ConfigureServices 中註冊


public void ConfigureServices(IServiceCollection services)
{
    services.Configure<mysetting>(Configuration);

    services.AddMvc().SetCompatibilityVersion(CompatibilityVersion.Version_2_1);
}


在 Controller 中使用 IOptions <mysetting>注入


public class HomeController : Controller
{
    private IOptions<mysetting> myOption;

    public HomeController(IOptions<mysetting> _option)
    {
        myOption = _option;
    }
}


新增 NuGet 後出現編譯警告 warning MSB3276 與 "AutoGenerateBindingRedirects" 屬性設為 true 的解決方法

新增 NuGet  後出現編譯警告


1>C:\Program Files (x86)\Microsoft Visual Studio\2017\Community\MSBuild
\15.0\Bin\Microsoft.Common.CurrentVersion.targets(2110,5)
: warning MSB3276: 在同一個相依組件的不同版本之間發現衝突。
請將專案檔中的 "AutoGenerateBindingRedirects" 屬性設為 true。
如需詳細資訊,請參閱 http://go.microsoft.com/fwlink/?LinkId=294190。

只要在 *.csproj 內加入


// '<'與'>'被改成全形了,記得改回來半形
<autogeneratebindingredirects>true</autogeneratebindingredirects>
警告就消失了

超簡單 Jenkins 安裝 MSBuild 外掛一鍵發佈 Visual Studio 專案

進入到 Jenkins 系統


進入「管理 Jenkins」的「管理外掛程式」的「可用的」的「MSBuild」


安裝完畢,勾選重啟 Jenkins

管理 Jenkins->Global Tool Configuration

找到 MSBuild


輸入 MSBuild 的預設路徑
版本:15(X86) 名稱:VS 2017(x86)路徑: C:\Program Files (x86)\Microsoft Visual Studio\2017\Community\MSBuild\15.0\Bin
版本:15(X64) 名稱:VS 2017(x64)路徑: C:\Program Files (x86)\Microsoft Visual Studio\2017\Community\MSBuild\15.0\Bin\amd64

建立新工作


Enter an item name 輸入個工作名稱
選擇「建置 Free-Style 軟體專案」
點擊「OK」


點擊「建置」
選「Build a Visual Studio project or solution using MSBuild」
選擇「MSBuild Version」
填入「MSBuild Build File」專案路徑
按下「儲存」


MSBuild 的 Command Line Arguments 可以指定 Debug 或 Release 組態等功能:
這些指令接續要多一個空白
/t:Restore :代表如果沒有Nuget套件他會幫你做還原的動作
/t:rebuild :代表他不管怎樣都會重新建置這個專案
/p:Configuration=Release :選擇你想要建置的版本(Debug、Release、Any CPU等)
/p:DeployOnBuild=true:允許建置完發行
/p:PublishProfile=FolderProfile.pubxml:選擇要發佈的檔案
/p:AllowUntrustedCertificate=true:允許未經信任的認證
/p:Password=IIS 發行的使用者密碼
/p:Configuration=組態名稱

右邊有一個編譯按鈕
W 下方的太陽表示編譯成功
點進去「上次成功時間」


點擊「Console Output」可以看到編譯結果的紀錄


2019年5月7日 星期二

超簡單安裝 Jenkins 持續整合工具 Windows 版本

Jenkins 是目前蠻多人使用的 Continuous integration  持續整合工具,簡稱 CI ,可以改善軟體開發流程,所以有一定的學習價值。

先去官網下載 Jenkins 的 Windows 版本:Jenkins 下載網址


執行安裝後,出現提示 Unlock Jenkoins,依據上面紅色字體路徑 C:\Program Files (x86)\....,取得文件內的密碼,再貼上輸入框內。


接下來 Customize Jenkins 我選 Install suggested plugins

等待下面 Getting Started 的安裝視窗,安裝有點久,去喝杯水上個廁所吧!


建立一組 Admin 帳號,然後按 Continue as admin 繼續

確認網址一下


按下 Start using Jenkins 進入系統


成功進入系統了


2019年5月5日 星期日

一毛錢都不用花,利用 GitHub 超簡單幫你建立免費網站

首先建立一個新專案
專案名稱一定要命名為「[GitHub帳號].github.io」的格式


[GitHub帳號] 如果是 Apple
就命名為 Apple.github.io

在專案裡新增一個 index.html 內容可以打


上傳後,在瀏覽器打上網址:[GitHub帳號].github.io
承上例 https://apple.github.io/
就能連上網頁


如何在 GitHub 上的 README.md 寫入 C# 程式碼

GitHub 上寫 README.md 如果須要寫入 C# 程式碼範例 可以透過 ```csharp 開頭包住程式碼並用 ```做結尾 格式如下:


```csharp
public class MyLogger : ILogger
{
    public void Print(string msg, Color color)
    {
        Log.Print(msg, color);
    }
}
```


這樣就能順眼的顯示 C# 的程式碼了,如下圖:


Visual Studio 2017/2019 推薦的擴充功能與更新

參考文章: 覺得 Google 的 Blogger 不太順手?透過 HTML 的 iframe 移花接木 HackMD